|
10/30/2017 0 Comments Seesaw icon shortcuts for activitiesSeesaw just keeps getting better! As an extension to my post from last week, I wanted to share how to get the Seesaw icons into your activity instructions. You can use this list of shortcuts by typing them in the “Student Instructions” portion of Activities. All you have to do is Type the instruction as you see it below and it will transform into the icon when you send it to students! Awesome right?!? Here is an example of what it looks like when you type it and then when you send it: 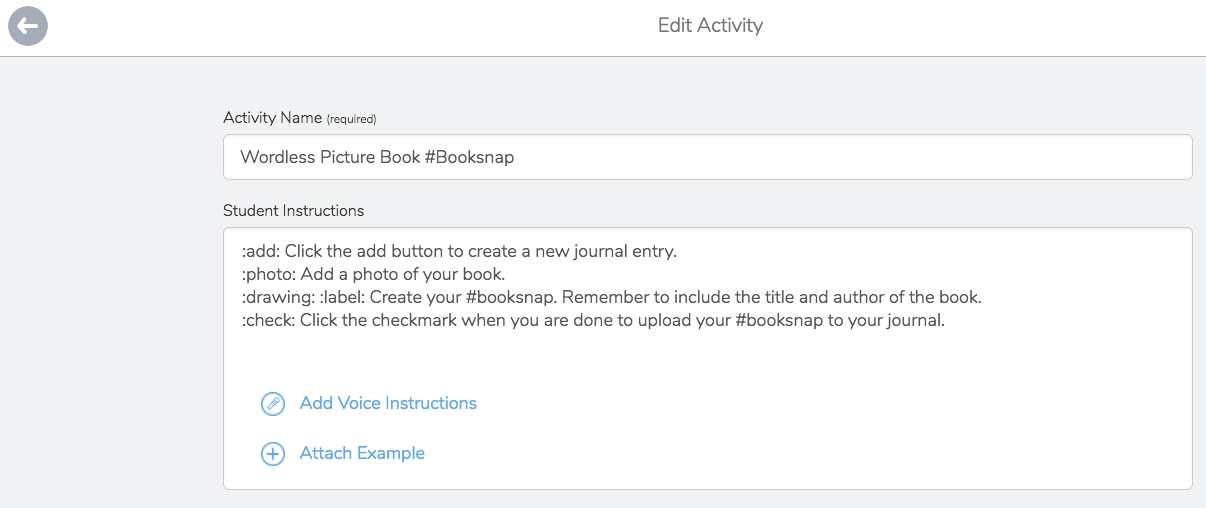 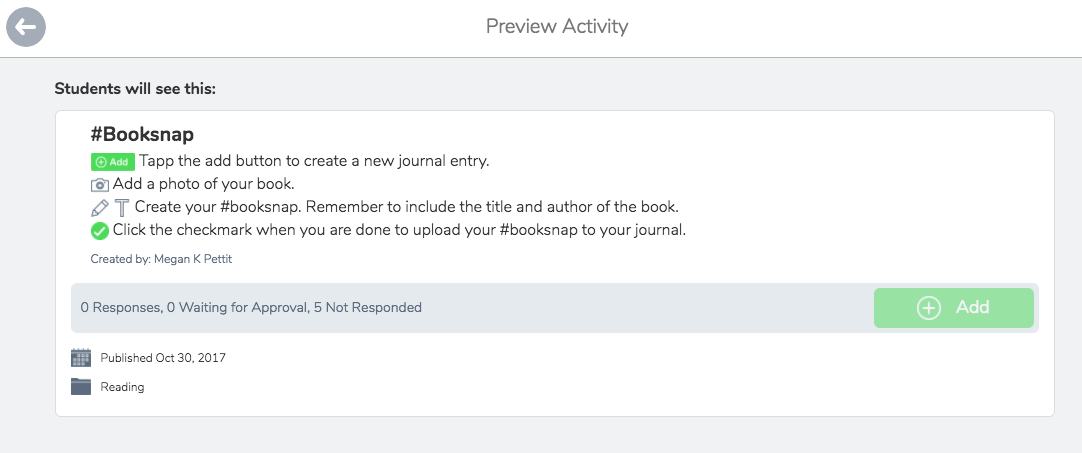
0 Comments
10/27/2017 0 Comments Three cheers for Seesaw activities!I am so excited to be able to share a new feature from Seesaw called Activities! If you have recently updated and logged-in to your teacher account you should have seen this option pop-up on your toolbar.  With activities teachers can easily create and share activities for students to complete in Seesaw. You can also get inspired with grade-level specific activities from the Seesaw library. Seesaw activities were created to provide teachers with simple activities that are ready to share with students in a few taps and to simplify your Seesaw workflow.
A few things to keep in mind:
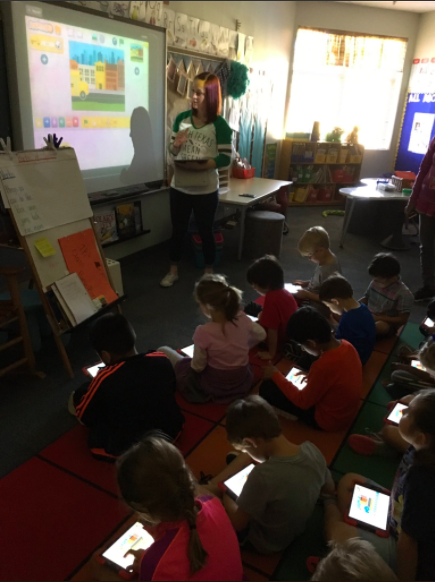
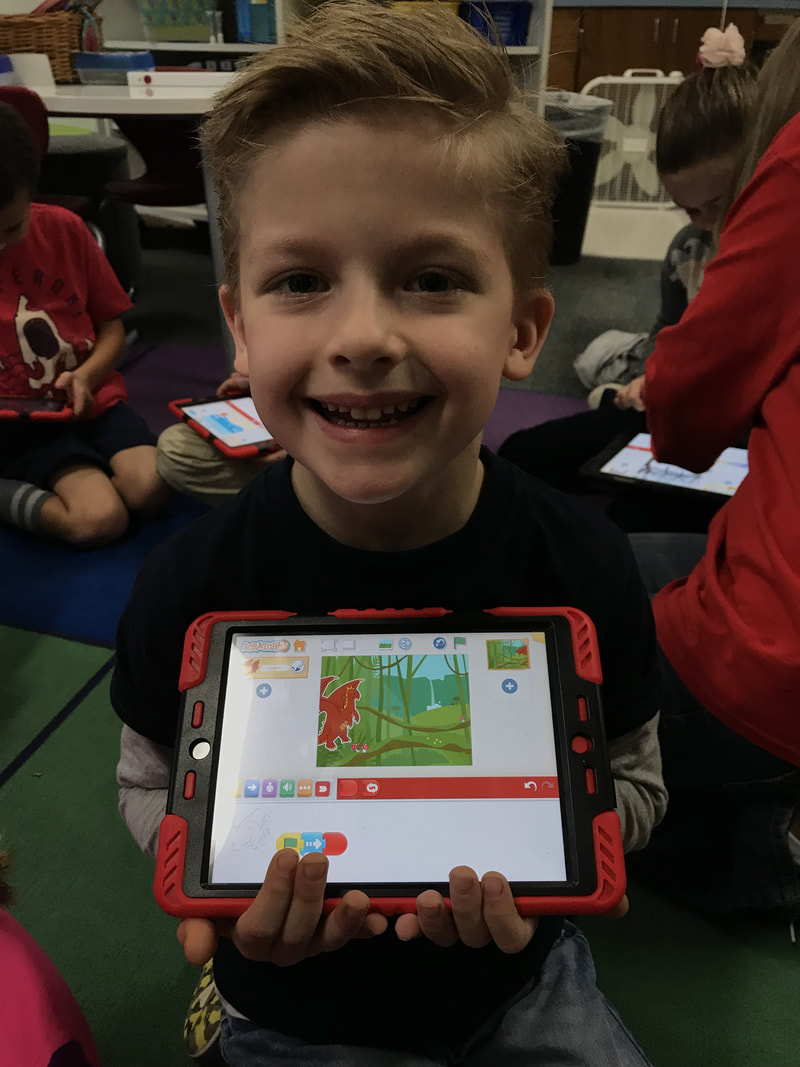
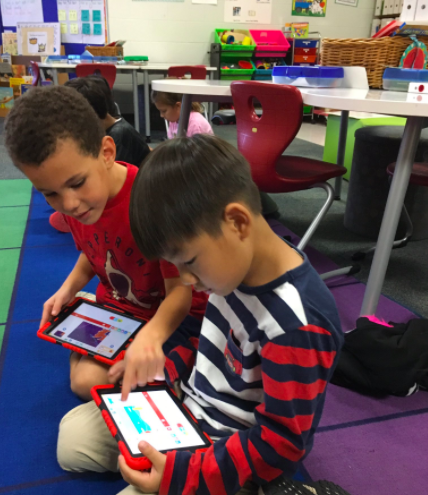
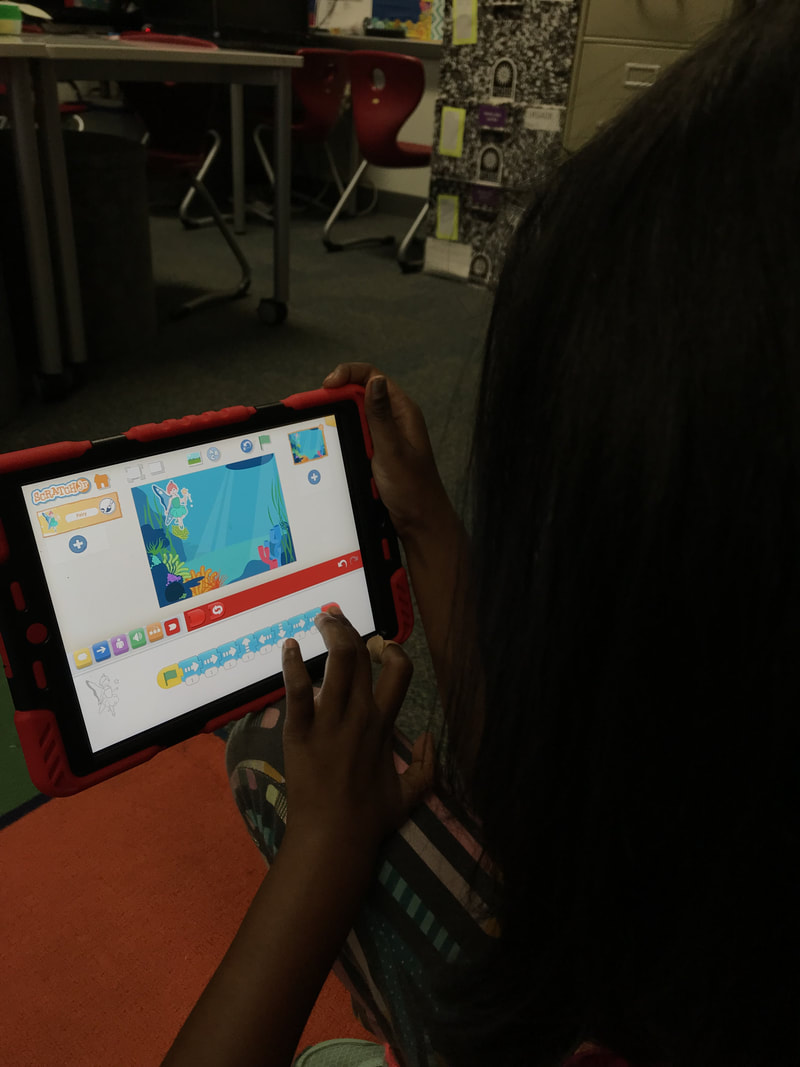
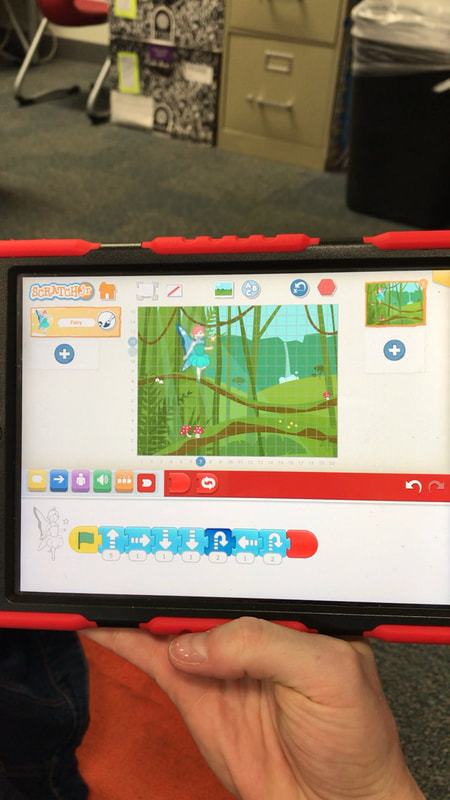
Here is how to get Started with Activities in Seesaw. Once you have gotten comfortable using the pre-made activities you can start customizing Activities in Seesaw. If you would like a face to face tutorial or to talk through ideas let me know! I am happy to help. Happy learning! Megan 10/18/2017 2 Comments digital storytelling with Scratch jrSonya Green (@smaygreen), a 1st grade teacher at Lakeside and I met to discuss how to integrate coding into content. Sonya's class has been involved in isolated coding lessons and practice so they have a good foundation for how block coding works and now we want to take those skills deeper. We decided to start by introducing the Scratch Jr app because it allows the learners to do interactive/ digital storytelling. Interactive storytelling involves combining digital media, such as images, voice, text, etc., to tell a story. Using Scratch Jr. to create interactive stories through code gives students a way to demonstrate learning, develop critical thinking and problem-solving, as well as use computational skills. 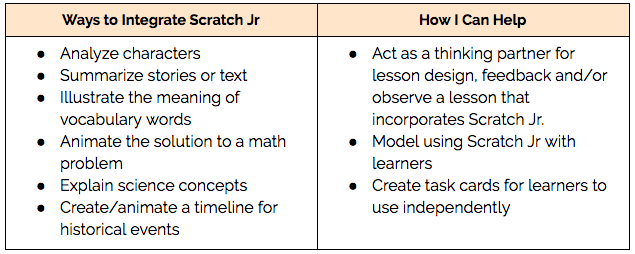 Today, we took the learners through the first activity from scratchjr.org called "Drive Across the City". This activity allowed the learners to learn some of the vocabulary scratch uses like stage, programming script, and blocks palette. It also allowed them to practice using the grid, adding/deleting characters, changing the setting, and writing their program scripts. After we completed that activity the learners had a chance to create their own scenes. They did a great job using more than one direction, problem solving when they were stuck, and helping each other find new features. I am so excited to continue working with Mrs. Green and her learners as they show their learning through code! 10/18/2017 0 Comments Sharing learning with ios11My DLC team has been teaching me A LOT lately! I am so thankful for their sharing so that I can continue to grow.
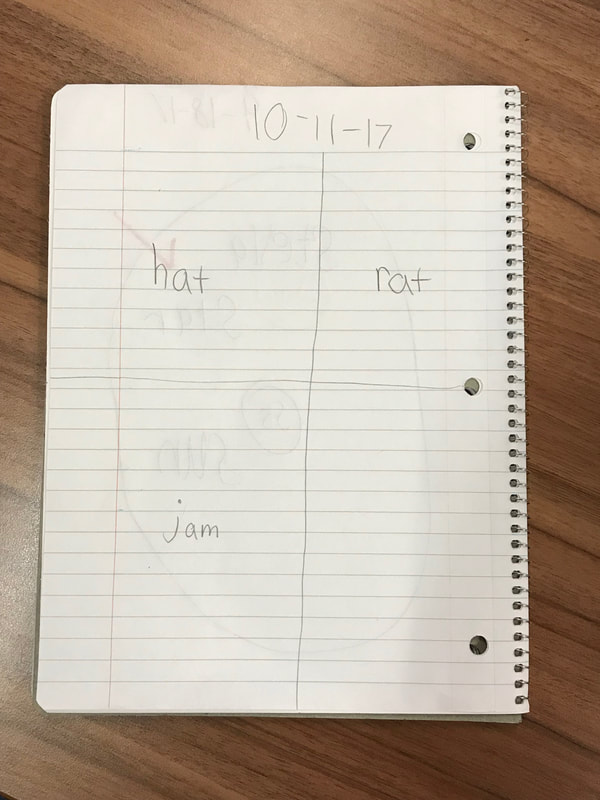
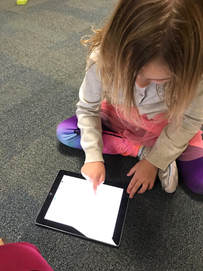
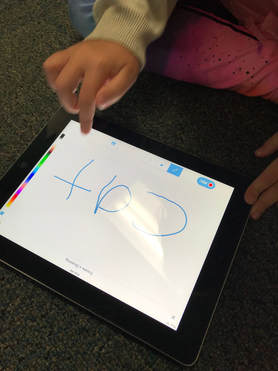
The content of this post come from my teammate and friend Alli Pryor (@dlcoachalli). She is the DLC at Cottonwood Creek and Lee Elementary. Alli has been digging deep into the new features of iOS 11 to uncover new/easier ways for learners to share their learning on their iPads. Check out her blog posts below and leave her a comment or two about ways you can use these tools in your learning space! 10/12/2017 0 Comments The Digital Workflow in actionLast week Natalie McDaniel (@MrsMcDanielK1), a kindergarten teacher at Austin Elementary, and I sat down to design a way to integrate Seesaw into her existing morning word work lesson. This morning I got to spend a fun filled hour with her learners stretching out CVC words and writing down the sounds we heard. One of the things I loved most about this morning was that it was a perfect example of a simple digital workflow (read my original digital workflow post here). The workflow does not have to be comprised of ALL digital parts. This is what the workflow looked like today: 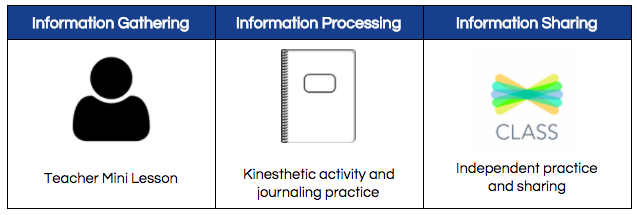
The integration of Seesaw into this existing word work lesson allowed the learners to independently show what they have learned. Also, it allowed Mrs. McDaniel a chance to formatively assess where her learners are in this skill.
We live in a world that recognizes now, more than ever, the power of collaboration. We ask our learners to do it. We ask our teachers to do it. We ask our administrators to do it. Today’s post is a collaboration with my teammate and frequent thought partner Sam Neal (Ya'll probably think she is my only friend). Even though Sam and I are on different campuses, we are on the same team, and frequently find that each campus is utilizing similar tools - or even asking similar questions. Both of us have been asked about where we design graphics for our sites, so we wanted to do a quick tutorial to show you how we both use Canva. Canva can be a useful tool for you in your classroom: 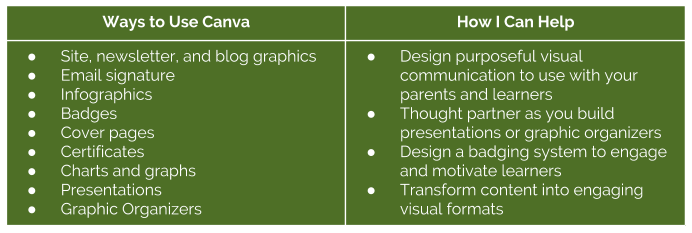 To show you some of the ways Canva can help you create your visuals, we are going to collaborate on a design for the quote that inspired this post: “Alone we do so little, together we can do so much." It’s a great quote, but it loses its impact when it merely appears in the center of all this text. Instead, we’re going to use a simple premade Canva layout to give the quote the impact and attention it deserves. Canva has lots of premade graphic sizes you can pick from, such as Photo Collage or Website Banner, which makes getting started so much less intimidating. We selected the Social Graphic size: 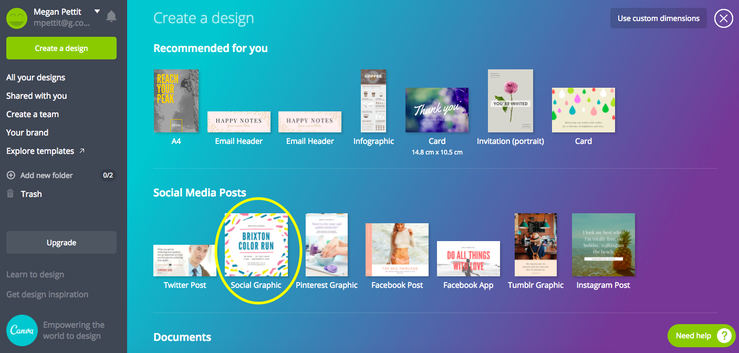 We wanted to keep it simple, so we selected a layout from Canva’s bank. Some layouts and images in Canva cost money, so be sure to select one with the tag “Free” in the bottom right corner of the layout or graphic. 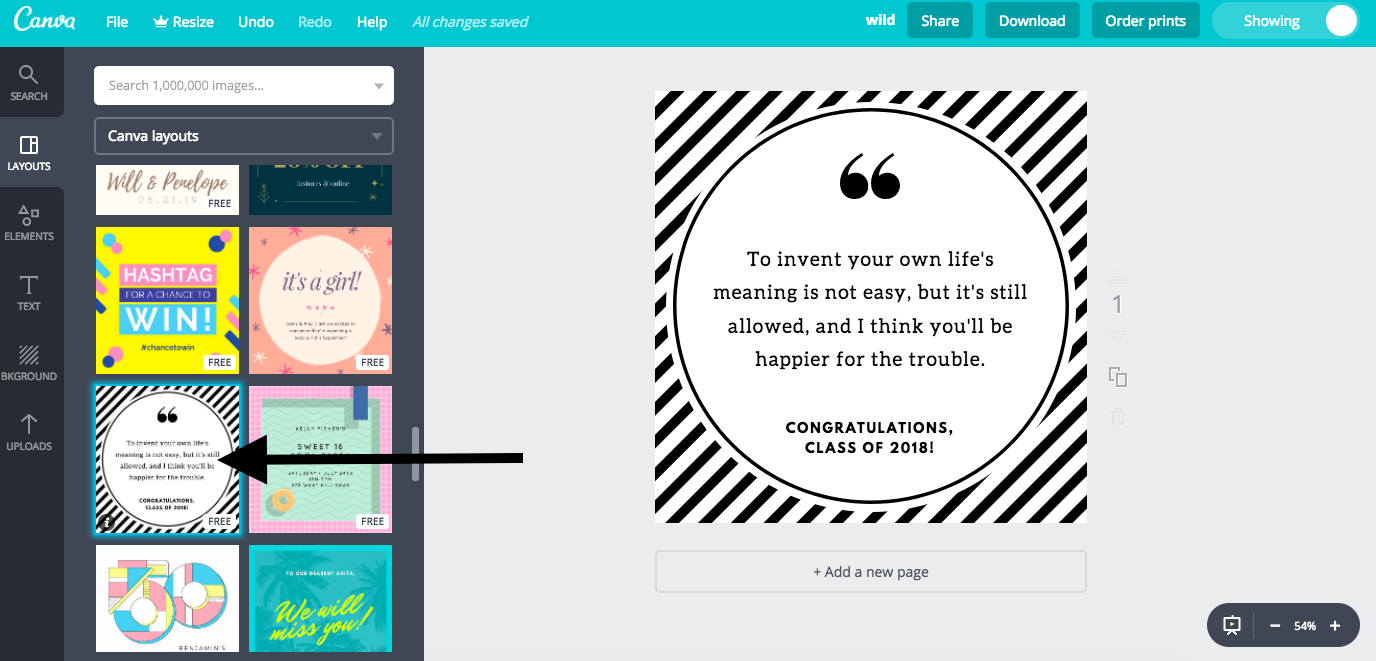 Next we added our quote in the text box. 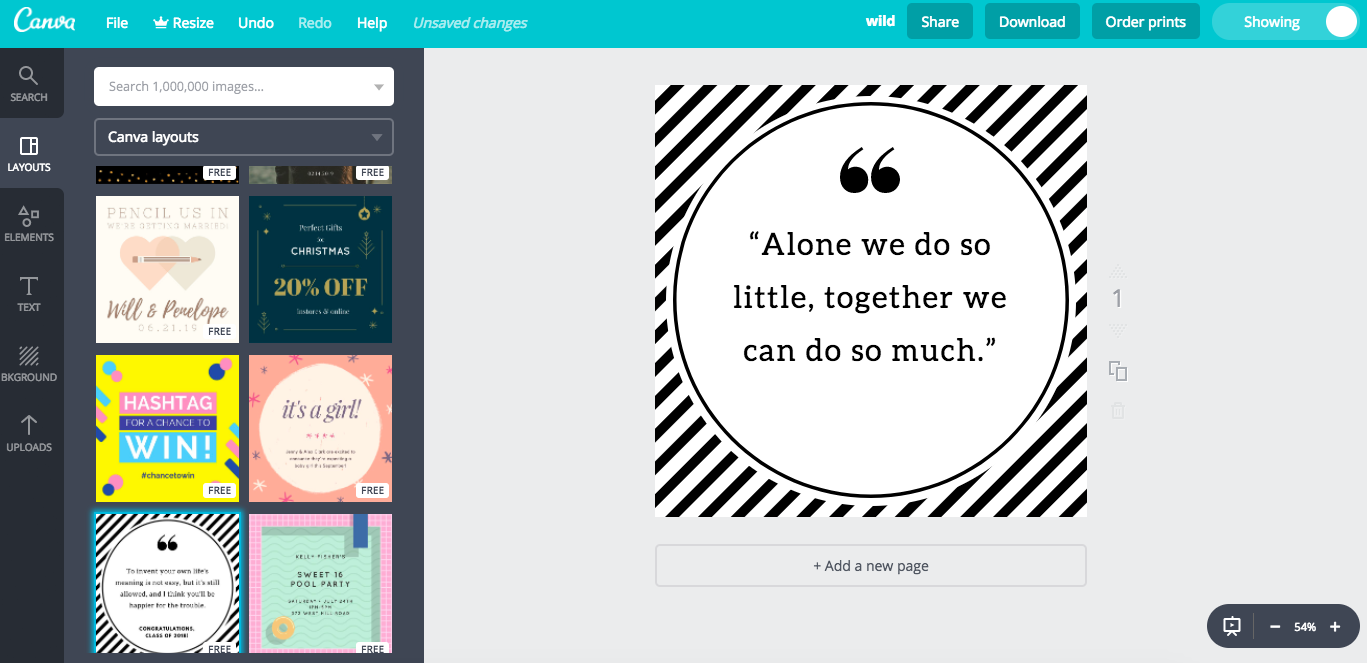 We changed the colors of some of the pieces by clicking on the object, clicking on the color box at the top of the screen, and then choosing a new color. We also wanted to be sure to attribute our quote to the speaker, so we added a small text box beneath our quote. 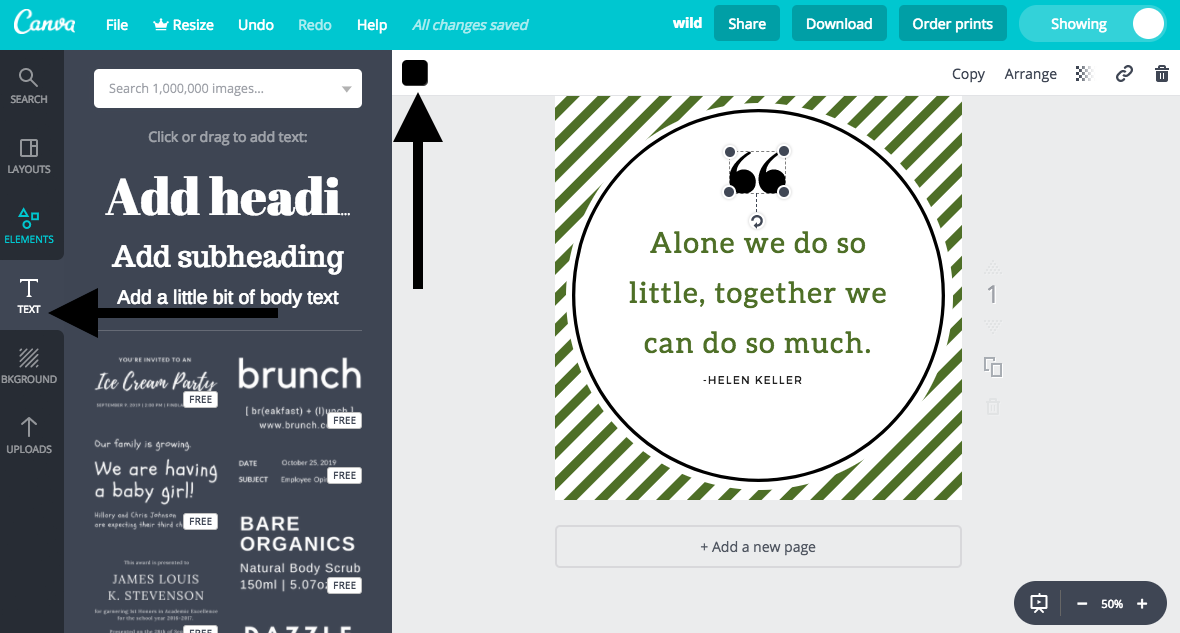 Once we were happy with the design, we clicked Download and chose PNG. Depending on your purpose, you could also choose JPG or even PDF. 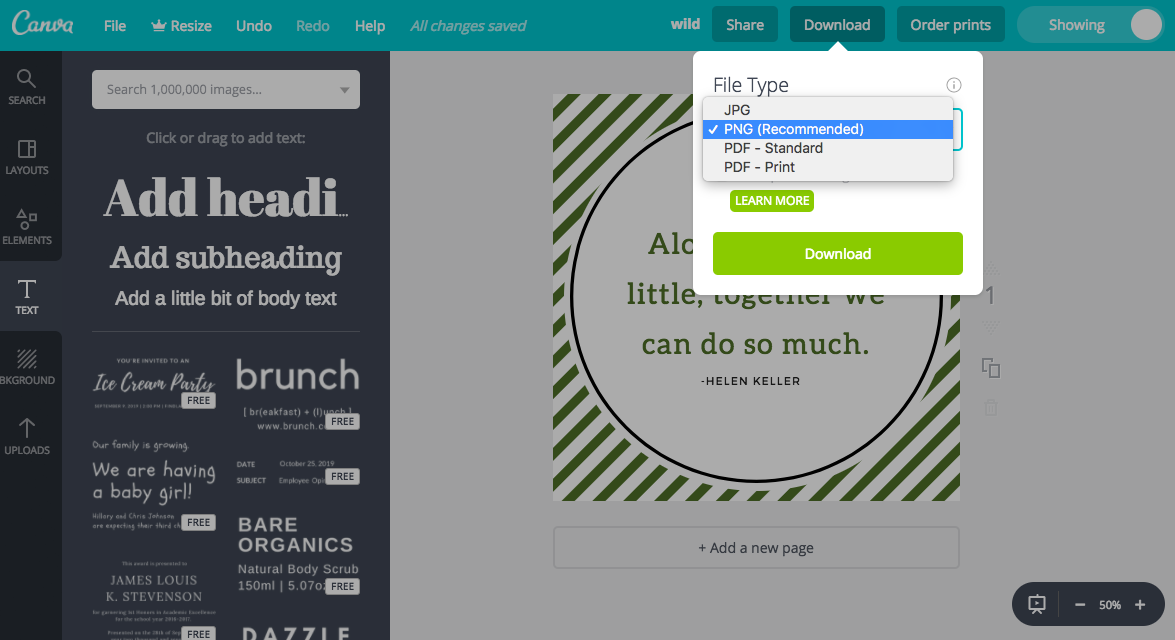 Look at the difference! 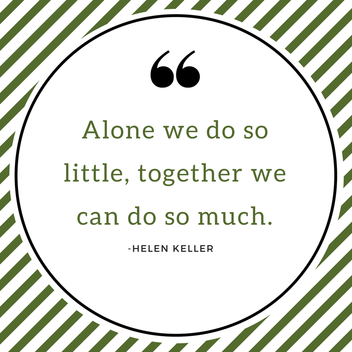 Let me know how I can help you transform the visuals in your classroom using this great tool. Happy Designing, Megan I think of myself as a learner before any of my other life roles (educator, coach, wife, dog mom, friend, traveler, etc.). I enjoy learning and doing new things. As I have moved into my role as a digital learning coach this year, I have found that my need for learning has jumped to a new level. Not only do I have so much to learn as a coach, but I need fresh new ideas to share with all of the educators on my campuses. I am so thankful for my DLC team, campus educators, and digital PLN that I can bounce ideas off of and learn new things with. One tool I use for learning and growing my PLN is Twitter. I am a pretty avid twitter user but I have never been great at joining Twitter chats. They have always seemed a little overwhelming to me. Last Wednesday I participated in my first Twitter Chat #educoach (normally I just creep for a few minutes and then leave). I found it much easier to navigate than I had previously experienced (thanks to help of TweetDeck) and I got some great resources to continue looking through. I felt like I was taking a step in the right direction for trying to reach my goals this year. At a recent DLC PLC meeting we were discussing Twitter chats and how to find them. After that discussion, my co-worker and Friend Sam Neal, wrote these AMAZING blog posts about Twitter chats and how to manage what she calls the "Twitterverse". Since I am all about learning from others I will let you read her posts instead of trying to re-write them myself 😉 . I hope you find her information as useful as I did and are able to continue learning from all of the amazing educators out there. Enjoy and happy learning! Megan |
Categories |

 RSS Feed