|
4/24/2018 0 Comments TalkingPoints Have you heard about TalkingPoints? TalkingPoints is a FREE classroom messaging service, kind of like Remind, that lets you message parents from the web or app. The thing that sets TalkingPoints apart from other services is that your classroom families receive the message in their home language! TalkingPoints includes over 20 languages for families to choose from so you can communicate with everyone. To learn more and to sign up for your FREE account, go to talkingpts.org
0 Comments
4/24/2018 0 Comments SOLE in ActionI previously posted about my StartSOLE learning experience and how excited I was to start using it with students. Dawn Rehling, a 4th grade teacher at Lakeside Elementary, partnered with me to try a SOLE session with her classes. The quick 3 minute video below shows how StartSOLE is changing the way students are learning in 4th grade. They are using research and their 21st century learning skills to share their discoveries about the big questions! If you would like to read more about StartSOLE visit startsole.org or download the StartSOLE app. If you are ready to do a SOLE session in your classroom I'd love to help you get started! My last TCEA takeaway comes from Kim Murphree, an Educational Technology Trainer from Mansfield ISD. She shared about how to create virtual tours through her presentation Virtually Yours.
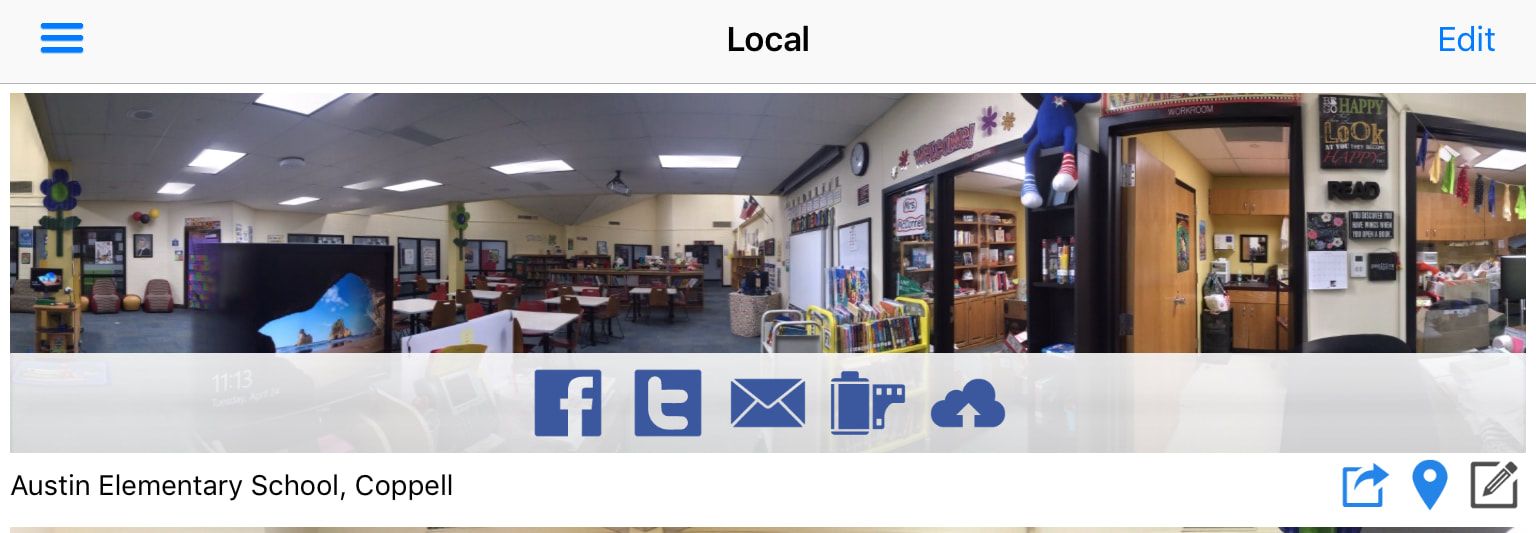
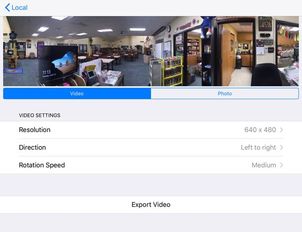
The DMD Panorama app creates high definition photos/videos that you can save or share with others.
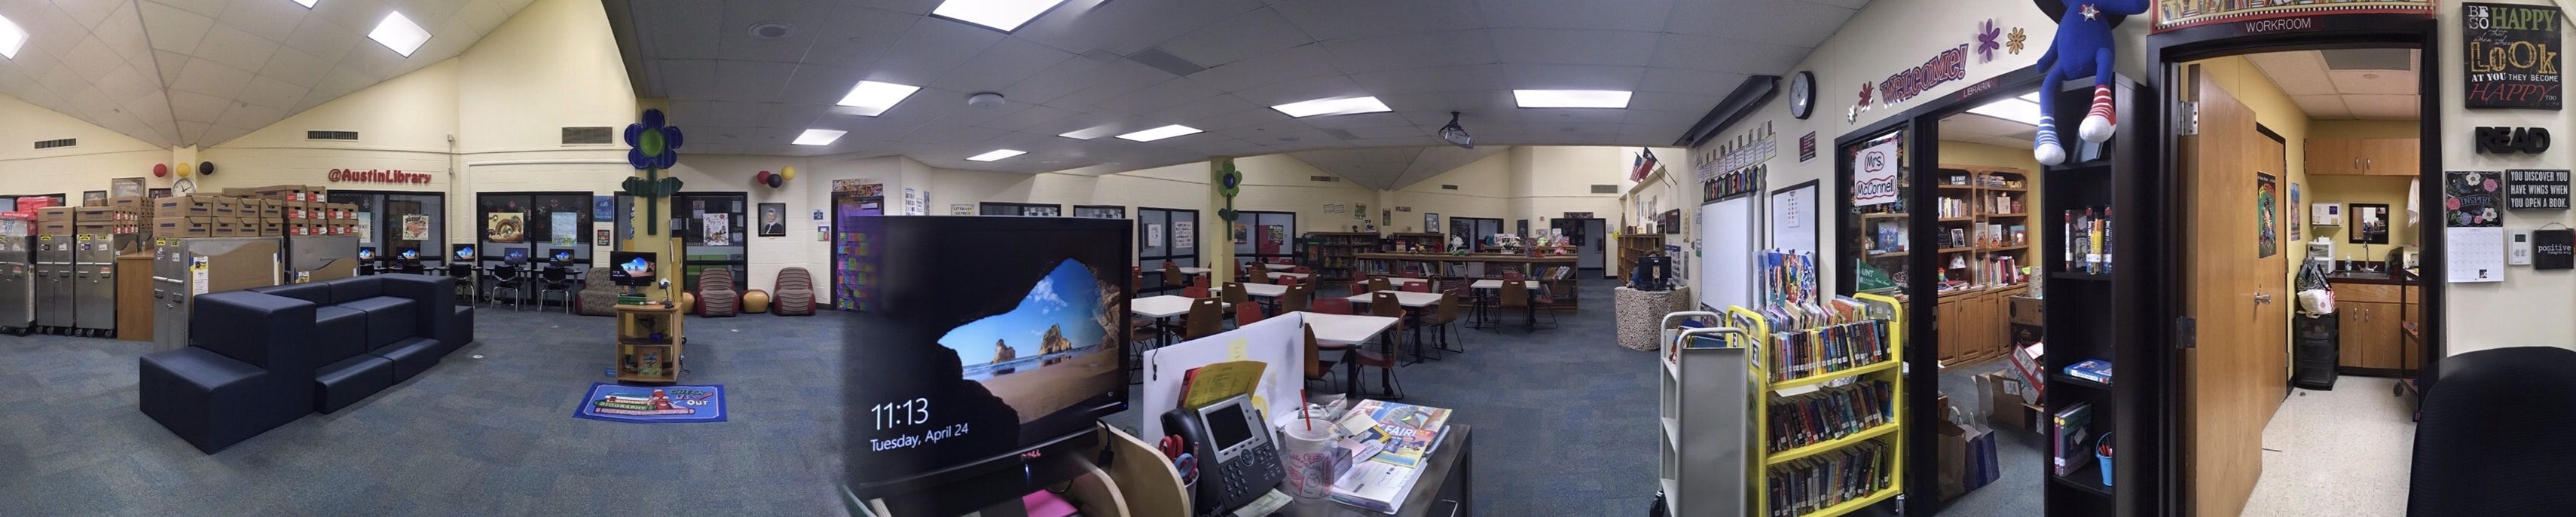 create 360° Virtual Tours with roundme.comNow that you have made your panorama photo, you can use the round.me website to create virtual tours. Learners can use the hotspot feature on their virtual tours to share their learning in any content area. Here are a few things to know when using Round Me for your tours:
Check out the screencast below to see how to add hotspots. In addition to adding hotspots you can play with adding directional sound. Like I said before, virtual tours can be incorporated into any content area. You can use your own photos or royalty free panoramic photos. You can use them for historical landmark tours in Social Studies, real world math examples, Story starters in writing, or explaining science concepts.
Here are my biggest takeaways on how to enhance the pedagogy for prewritten lessons: 1. Make it yours! Choose TEKS to focus on and pick success skills emphasize. 2. If applicable, Do the lesson yourself! Look for loopholes, find problems, gauge timing, ask yourself how much critical thinking are you having to do to complete the task. 3. Use the Design Thinking Process. Can be done orally or written; Good model for all ages; Can be used in ANY content area! ( I would love to discuss this more with you) 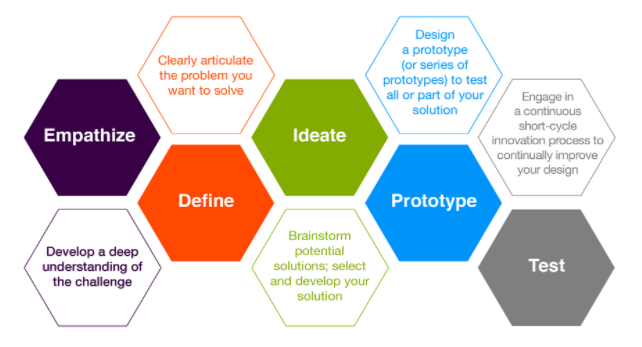 4. MOST IMPORTANTLY, Do not rush past the learning! Make time for data recording, make time to reflect, and make time to explicitly connect the objectives to real world.  3/22/2018 0 Comments TCEA Takeaways: Mindful tech useI attended a fabulous session at TCEA led by Owen Nesbitt, a digital learning specialist from Birdville ISD, called Zen and The Art of Mindful Tech Use. Owen opened with this quote, 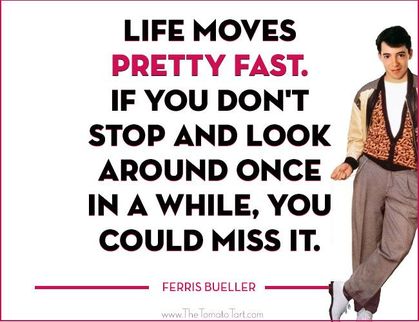 Ferris Bueller could not have spoken truer words and he didn't live in a technology filled age. We live in a time where information is coming at us all the time. Are we taking the time to stop and process all of that information? More importantly, are we teaching our kids to take the time to stop and process? I loved this session because it really spoke to my research and beliefs on the digital workflow and intentionally building innerput into our lessons. I also loved that Mr. Nesbitt's solution to slowing down and processing was not taking technology away but teaching students how to find stopping ques and use their devices to help them become more mindful. He says his "keys to the game" are to:
You can find balance, wellness, and healthy tech use by trying to be intentional in your use of technology. Make sure that Whatever you’re doing, do it completely. Pay attention to how many tabs you have open. When you have to open a new tab as you work, close it when you no longer need it. Also, avoid multitasking when doing your work. Here is a list of some apps that can help you and your students slow down and be more mindful:  Calm Calm is a great app and website that gives you a quick pause to your day. It helps you deal with your emotions and helps reduce anxiety and stress. Calm offers free teacher accounts through calm for schools! https://www.calm.com/schools  Happify: For Stress and Worry Happify gives you tools and programs to help you or your class take control of your emotional wellbeing. Its programs can help you reduce stress, overcome negative thoughts, and build greater resilience.  Headspace: Meditation Headspace calls themselves a "Mindfulness coach right in your pocket". They offer sessions on everything from stress to sleep and even offer sessions for kids.  The Mindfulness App This app offers a five day guided practice and introduction to mindfulness. It gives you timed sessions, personalized features, reminders and statistics. If you would like to read more about mindfulness here are some articles to check out:
 Today was my first day back from my spring break adventure and also The Great iPad Challenge day! The DLC team challenged ourselves to go a day using only our iPad to complete our work. No MacBook, no Apple Pencil and no external keyboard. The same way a 1:1 learner in our district would have to complete their school work.
When I woke up this morning I was uneasy about leaving my MacBook and Apple Pencil at home but I knew it would be the only way to force myself to only use my iPad. I was also thinking about some of the administrative tasks I needed to catch up on today, since I was out the beginning of this week, and it really made me think about how I was going to tackle that work without my MacBook. I was scared! Luckily, most of my day has been spent in classrooms working with learners. When I am in the classroom I prefer to use my iPad to project things, airdrop pictures/documents to and from learners, and stay connected on services such as Twitter. My iPad allows me to be mobile. A great example of this is How I was able to use my iPad during two 4th Grade SOLE sessions this morning. I connected to the projector through the StartSOLE app to show the learners the task parameters and display the timer. During the investigation stage I walked around, took pictures and gave real time feedback to the group that showed up on the screen. In between giving feedback I was also able to take personal notes and tweet about our process. It was AWESOME! Now that I am sitting here in my office tackling all of that other work I was worried about I feel kind of silly for being worried about it. I am still able to search on the district website for the people I needed to contact. I am still able to write all of the emails that need to be written, and I am still able to check in with my teammates and ask questions through the Slack app. I am even creating this blog post on my Weebly app! My biggest frustration of the day was when I was reading my book study book during lunch and trying to take notes in Noteability. Not having my Apply Pencil to draw with put a stop to my sketchnoting for this chapter. I put my creativity to the test and decided to type and use GIFs in my notes. I didn’t know how spoiled I was with my Pencil! I also normally read on my MacBook while I sketch on my iPad. since I don't have my MacBook to use, I was forced to use the iOS11 split screen feature to read and take notes at the same time. It was fun to try a new feature. The Great iPad Challenge made me realize that for me, and the work I had to do today, it isn’t about if I can or can’t do my work on my iPad. It is about my mindset and how I have determined what kind of work I like to do on each device. This past November I attended the Are 10-11 TCEA Idea Conference. The keynote speaker, Steve Dembo, talked a lot about innovation and how we need to bridge the gap between school learning and students’ passions. He also talked about the viral video effect and how we live in a “YouTube generation”. Did you know that YouTube is considered the 2nd largest search engine in the world?!? Video creation tools and platforms such as YouTube contribute to learning worldwide. People look to videos to learn a skill, better understand a subject, complete a DIY project and yes, yes... watch toy unboxings. Research has shown that the majority of people prefer to watch a video over reading a block of text online. You can read more about the science behind visual marketing and how the brain responds to it here. How can we get our learners to positively contribute to this viral video culture through their learning at school? My answer is through the use of one of Apple’s native apps, iMovie. Video can be a powerful learning tool that makes communicating messages convenient, more memorable, and contributes to the worldwide community of teachers and learners. The videos that most positively affect learning are short and engaging, but creating a short and engaging video that communicates deep learning in a simple way is a difficult task! It requires critical thinking, creativity, and communication skills. iMovie is a great tool to use to make the task less daunting.
Here are some creative ways Steve Dembo shared for how students can use videos to communicate their learning (See all of Steve Dembo’s Idea Conference presentations here):
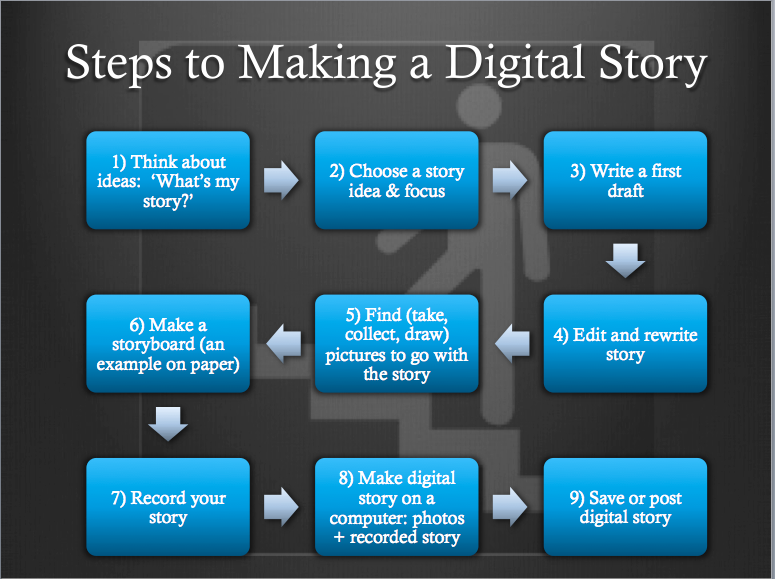
How to make a video in iMovieI know some of you have been reading and wondering "where is my tutorial?" or you just scrolled to the bottom to find a tutorial so here you go... a YouTube video tutorial on How to Use iMovie ☺️ What awesome creations have you and your learners made using iMovie? What helps you when teaching learners how to film? Share some examples and ideas in the comments!
In the DLC Winter blog series, An Apple a Week, Brian Timm highlighted best practices for using Keynote in the classroom. I have had a few experiences with Keynote personally but have never used it in the classroom. At TCEA I was able to dive deeper into the amazing tools inside of keynote and brainstorm ways for students to use them to share their learning. My favorite tool in Keynote is Magic Move. Using Magic Move within a Keynote presentation allows learners to animate their information. This brings their learning to life in a very creative way. I was so excited about magic move that I have already collaborated with Dawn Rheling and her 4th grade classes at Lakeside so they could start using it to share their nonfiction writing. My next project is a collaboration with Kristy Kaprelian and her Kindergarten class at Austin to use their knowledge of 2D shapes to create shape pictures also using magic move.
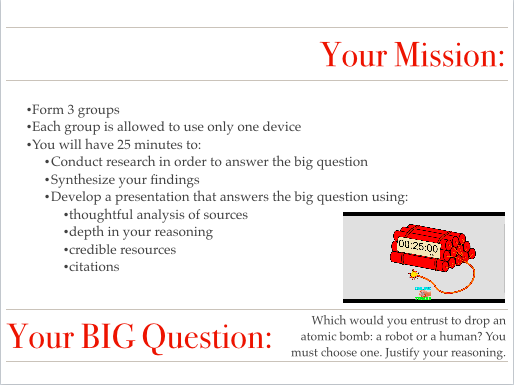
Want to see more examples of how to use Keynote in your classroom? Click the button below! 2/26/2018 1 Comment Im a SOLE man...Every Friday our DLC team meets for our PLC time. Each week a different member of our team leads learning to continue our growth as digital learning coaches. This past Friday Sam Neal, the DLC at Mockingbird and Pinkerton, led learning on Self-Organized Learning Environments or SOLEs, which draw on student's natural curiosity to create a dynamic space for them to learn, interact and develop critical problem-solving skills. Sam had our team experience a SOLE session and then during our reflect time we discussed the process and why it is beneficial for students to participate in these experiences. There are three parts to a SOLE session. A big question, the investigation and a review. Part 1: The Big question
Part 2: The InvestigationOnce Sam answered all of our clarifying questions she told us to get to work. We decided how to break into groups, we decided what resources to use to research our question and we decided how we wanted to present our findings to the larger group at the end. The investigation time is ALL student driven. The teacher acts as a facilitator asking open supportive questions and giving encouragement. In the Blues Brothers song Soul Man the second verse starts with the lyrics "Got what I got the hard way The students might have a hard time organizing themselves, finding the best resources and working together to finish THE FIRST TIME. If they struggle and make mistakes they will learn from them and figure out how to be more successful in future SOLEs.
Part 3: ReviewIn part 3, the review stage, the learners present their findings. This is the most important stage because this is where the learners have to figure out how to effectively communicate what they have found and how they found it. If the groups do not have a presentation, do not answer the big question or are presenting on a completely different topic that is OK! Each team has a chance to hear "I likes" and "I wonders" from the rest of the group. This is also the best stage to talk about goals for next time.
Being involved in a SOLE session really opened my eyes to a new way to approach integrating research, growing 21st century skills and tackling real world issues that correlate to our curriculum. SOLEs really allow learners to do what Mrs. Frizzle from the Magic School Bus always challenged us to do... Take chances, make mistakes, get messy! 2/26/2018 0 Comments An apple a week: Book Creator The latest installment of the Winter blog series An Apple a Week is all about an amazing tool for Chrome called Book Creator. With Book Creator for Chrome, our kids can:
Did you know the Apple a Week blog series is also a podcast? You can catch up on reading or listen to an episode by clicking the button below!
|
Categories |
 RSS Feed